Easy Oat Flour Waffles + How to Cook Them on a Cast Iron Waffle Press
It was years ago now that I put my non stick waffle iron in the garage and told myself it wasn’t coming inside again! We have a family waffle ritual and I just wasn’t biting the bullet on getting rid of that one last piece of teflon from my kitchen. Because of safety concerns and the lack of durability I’ve slowly opted out of non stick teflon throughout our house. I hadn’t ordered a new one but I knew it was going to take throwing out the old one to make me move forward!
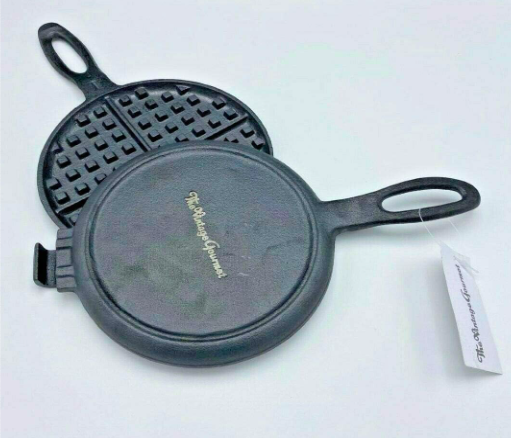
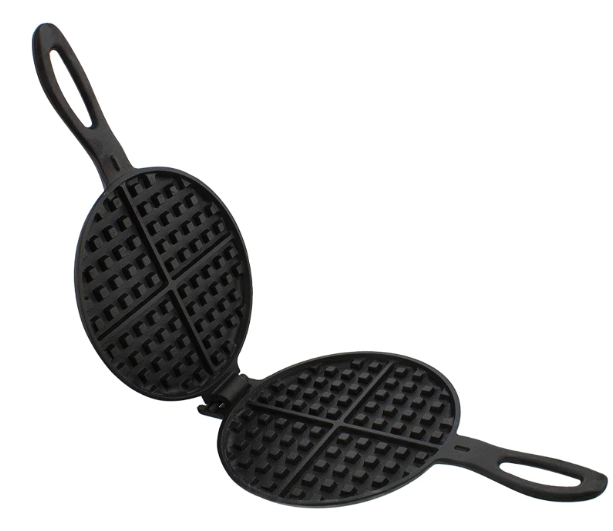
Shortly after I was gifted a shiny new cast iron waffle maker (US link) (UK link)!
Cast Iron Waffle Makers
The reviews on cast iron waffle makers are very mixed but I’m going to say the bad reviews are people not using it right or not knowing what they bought! With a bit of learning, they are easy to use, last forever, and make perfect waffles!
Seasoning Waffle Irons + Non Stick Surfaces
Some cast iron waffle makers come doesn’t come “pre seasoned” and some don’t. The seasoning is what makes cast iron beautifully non stick without any questionable coatings in terms of health. It also is a non stick finish you can’t ever completely destroy meaning its a very sustainable option and will last forever. If you ever need to you can re-season, or scrub it down if it’s rusts or burns and totally start again! The UK linked one here does and the US one doesn’t – both are fine. If you get an unseasoned one you need to take a few hours and do that yourself. Seasoning on an outdoor grill is the easiest but I’ve used my oven and it smokes the house out a little but I just open the doors and it works fine.
How to Season a New Cast Iron Waffle Maker
To season cast iron I use coconut oil, a metal scourer, and paper towels. Follow any instructions on the waffle iron but they may have a wax coating to be melted, scrubbed and wiped off if they’re new. If you’re working to restore cast iron or with a simple unseasoned piece:
- Give it a good scrub with soap and a metal scourer till any rust, black and dirt are fully off.
- Then wipe it all over with coconut oil (I love a mini silicon brush to get in all the little corners)
- Bake the cast iron waffle maker (or any cast iron piece) at 400F/220C or the highest heat your oven will go for an hour. Put it upside down and put a cookie sheet of foil under it to catch any oil drips.
- Leave it in the oven to cool. It turns black when it’s properly seasoned!
Then just store it, and use the silicon brush (or spray) again when you’re ready to use it to cook some waffles!
You can get your hands on the waffle iron on amazon HERE.
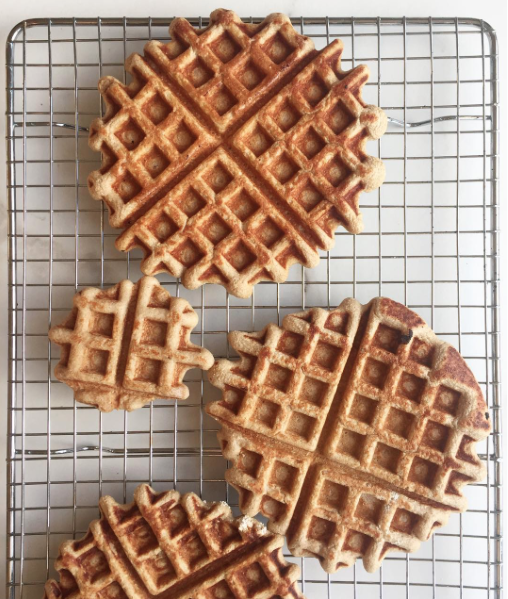
Easy Blender Oat Flour Waffles
Equipment
- 1 bowl
- 1 Waffle Iron
- 1 Fork to Mix
- 1 Blender (not essential but makes it easy!)
Ingredients
- 1/2 cup oats (or fine oat flour)
- 1 Banana
- 3 Eggs
- 1 tsp Vanilla
- 1 tsp Baking Powder
- 1/2 tsp Cinnamon
- 1 tbsp Coconut Flour
Instructions
- Throw just the oats in the blender (or a coffee grinder) to start with and blend them on high until they are a fine flour.
- Then just throw in everything else into the blender, and blend again until it's a smooth waffle batter – so easy!! You can also mash the banana and mix with pre ground oats in a bowl using a fork.
- Heat the waffle iron to a high heat before adding any batter. The non stick of cast iron comes from adding food only when the cast iron is hot.
- When it's hot, use a silicon brush to brush on a little oil of butter to all sides that will touch the batter. Add in about 1/2 cup of batter. It will spread as you close and cook it.
- Cook it for a couple of minutes on each side until it's browned and pops out of the waffle maker easily. You'll need to experiment with your own stove and waffle iron to perfect the process so don't give up on finding exactly the best cooking tome for you.
- Place the waffles on a cooling rack in a warm oven until you're ready to serve them! They can also be cooled and frozen then reheated in a toaster oven.