11 Things You’ll Need to Start the Bee Journey
Before reading this, know that if you’re a beginner I’m only about one step ahead of you! But I want to share the journey from the start to make it seem simpler or easier or whatever we need for more people to dive in too!
There are so many ways to go on the journey of bees, so these are starting points or things to research but my hope is to give you an idea of what the journey might look like and what you need to look into.
All of those things don’t add up to being able to keep bees, I’m a few weeks in – these are just where I’m starting and things I didn’t know how to budget for or plan for because I dived in. But hopefully it’s a picture of what you might need to start researching and budgeting for as you start!
1. A Hive
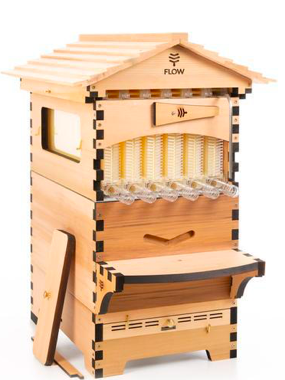
Bees naturally build in small spaces, and if you’re going to keep them it’s
probably going to be a hive. I went for a flow hive. The bee keeping aspect is the same the things that differs is the honey extraction aspect. There are different sizes and shapes and systems for hives – Langstroth and National being two of the most common with some other less traditional ones on the market and some more DIYable simple options too.
I bought a bundle like THIS hive bundle for a total of about £650. The hive itself it THIS one which is £600 one it’s own.
2. Bee Keeping suit
People tend to their bees without bee keeping suits but I’m not about to do that! Not at this point anyway. Keeping calm around them is so important and for one, a bee suit really helps with that. I got the one that comes in the Flow Hive bundle but you can probably track down a second hand one.
I bought THIS one in the bundle but it’s unbleached organic cotton and £91 on it’s own. I got a large so we could have anyone wear it and it’s much too big but works!
3. A Nuc (that’s the bees!)
(…and Wood + wire to adjust the frames if you’re like me and the nuc frames aren’t the same as the hive. That was a slip up on my part but it was the only nuc I had access to so I’d do the same thing again, it’s not hard to make that adjustment.)
A “NUC” is a few frames of bees and a queen ready to go. There are other ways to start up a hive but this is probably where you’ll start.
I got mine from Local Honey Man where you can also get a full hive with bees if you’d rather go that way. You’ll also potentially need to think about what type of bees you want at this point too.
My cost for the nuc was £220
4. Paint
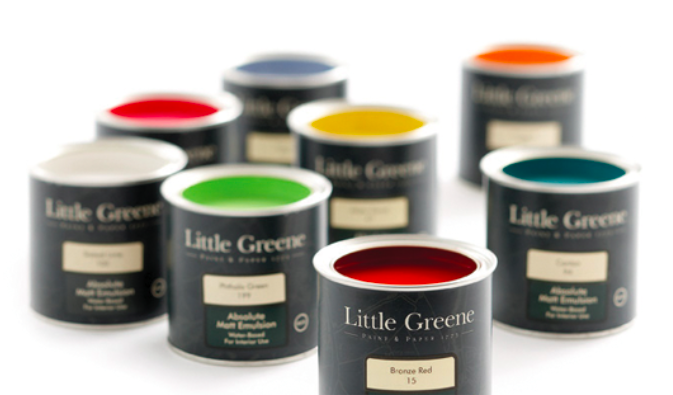
You don’t need to paint your hive but you want it to withstand the elements and depending on where you live you could paint it or oil it. It’s suggested not to varnish it as it can trap moisture, and I went for paint over oil to protect it well from the English rain and wind. You know I’d always go for a low VOC non toxic option but it’s especially what you’ll want because it’s where your bees are going to live and make honey!
I chose Little Greene for being a great eco and non toxic option. It’s pricey, even for the size of a bee hive. Note: I used about 1 litre of paint on top of primer. I went for 2 colours so I spent more, and had some leftover.
My paint cost was £90 for one can of primer and 2L of colour but I used half of it.
5. Videos
Over the last few months I’ve watched probably 50 hours of videos on YouTube to learn everything I can. I’ve watched lots of the FlowHive videos and weekly lives as well as using YouTube where I found gaps in what I knew. You can also take an online course and there are many out there but I chose to go with videos and a mentor.
The Honey Bee Research Centre has a series of great intro videos HERE
The Flow Hive youtube channel HERE is also a great one.
6. A mentor
I didn’t know how essential this would be, but having people to ask is I think essential. You’re going to need someone who is local to you who can tell you about the local seasons and things specific to bee keeping in your area.
7. Local bee keeping club + groups
Something to consider is joining a local bee keeping club or group. There are many of these around so have a look in your local area so yo have support – they can also be a place to borrow equipment.
8. Feeding apparatus
Your bees are going to need feeding when they arrive. They’re not an established colony of bees, their numbers are small and they’ll need food at least to start with. I used a sugar and water syrup in a jar on the top of the hive but there are other kinds of feeders too.
THIS video is long but shows how the method I used.
Free: A used glass jar.
9. Sugar
To make the sugar syrup you’ll want white sugar not brown sugar (yes, really – much as I wanted to use organic bulk succanat I’m not doing that!)
Cost: Low but potentially ongoing.
10. Hive reducer
Again, because they’re numbers are small you’ll probably want to reduce the size of the entrance so they’re better able to protect yourself.

Cost: Less than £5.
11. Smoker
Again, some people work with their bees without a smoker but I don’t
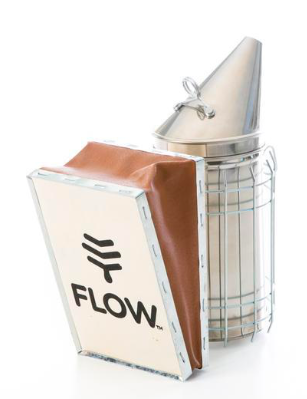
want to do that! Firstly I want them calm for my own sake, but they also get stressed when you go in and interfere with their hive so using a smoker can help calm them for their sake. I fill mine with egg boxes and dry leaves!
Cost: £20-80 (mine was included with the flow hive bundle)
Remember
All of those things don’t add up to being able to keep bees, I’m a few weeks in – these are just where I’m starting and things I didn’t know how to budget for or plan for because I dived in. But hopefully it’s a picture of what you might need to start researching and budgeting for as you start! If there’s something else you’d add comment below so other’s can see!
